


In normal life Rebecca is an archaeologist, but she has turned her sewing skills into a community project. Along with two other sewers the three “Smyrna Sewing Sisters” have produced and donated 400 masks so far.
How to Make a Cloth Mask:
There are a lot of opinions available right now on the efficacy of DIY cloth masks; but a cloth mask can be essential to slow asymptomatic spread of COVID-19. We know that this virus is contagious before symptoms appear and so a good way to prevent spread is to protect from inadvertently giving the virus to people you may have contact with when getting food or other essentials and especially once we resume a more normal life, to prevent a second wave of infection.
Materials:
For this project you will need two layers of a tightly woven fabric (cotton broadcloth is ideal), needle and thread, scissors, ruler, pen, dress pins or clothespins, and elastic. If you are not a sewer, don’t worry, it is easy to construct a mask from items that you can find around your house and watching a few YouTube tutorials to learn techniques. If you have children, this is a great life skill to have them learn.
Having a hard time finding these materials? A bandana can make three adult size
masks or maybe you have an old sheet that can be used or a stained dress shirt also make good alternatives. Can’t seem to find elastic? Consider the following alternatives: rubber bands, crafting elastic, disassemble a bungee cord, use a stretched out hair band or repurpose the elastic from some underwear that you don’t like anymore. If you can’t find elastic use ribbons or cloth strips to fasten ties to hold mask to face. One caveat to note, if you want the highest amount of protection possible for your mask then you should look around your house for the “fabric” reusable shopping bags. The “fabric” is blown Polypropylene (one brand name of this utility fabric is Oly) and preliminary test have shown that it prevents virus particles from penetrating. You can substitute your fabric for this material or insert it as a filtering layer which is what we do in producing our masks intended for healthcare workers.
Assembly:
1. Cut fabric into two rectangles: 6 x 9 inches for adults (13 and older) and 5.5 x 7
inches for children, cut two pieces of elastic to 7 inches for adult mask and 6
inches for children.

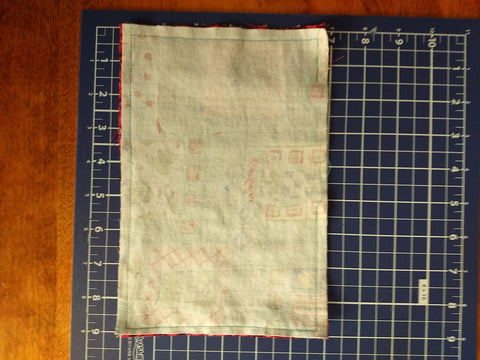
2. Place the outside layers of material together and sew around the edges about a
¼ inch from the cut edge. You can use a simple running stitch to quickly join the
pieces together. Make sure you leave a couple of inches open to turn the piece
right side out.

3. After turning your mask right side out, you will need to topstitch all the way
around the rectangle. If you are hand stitching, you want to use a true backstitch
(here is where YouTube tutorials come in handy).
4. To create a better fit we fold a box pleat in the middle of our rectangle. (See
picture) Use pins or clothespins to hold the pleat down while along the edge.
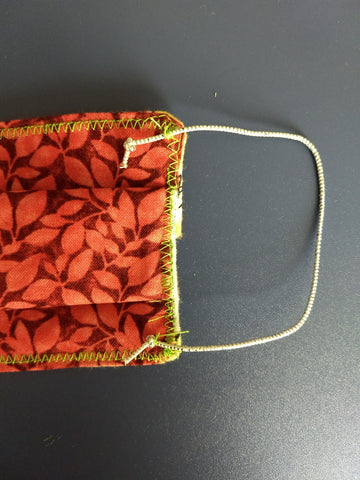
5. Tie knots at end of elastic and use a bar tack stitch to sew elastic to the corners
of mask; this allows the mask to be adjustable by changing the position of the
knot. To sanitize your mask before and between wearings, simply microwave for 30 seconds on a paper plate.